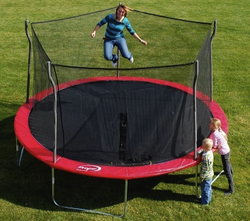
Pick a day when there's good weather in the forecast to start setting up your trampoline in the yard, because the last thing you want is to have to run for cover while your trampoline parts get soaked in the rain. Spread all the trampoline parts out on the lawn and organize them into like piles.
Every trampoline brand is different, but for a basic round trampoline you should be able to spot four (or more) top rails that have leg sections attached. These will look like curved pieces of metal that have short tubes extending out from either end. You should also be able to see four leg bases (which are often shaped like the letter "W"), and eight straight metal leg extensions. In addition to these frame pieces, there will be hooks, springs, a trampoline mat, (the net-like fabric that will be stretched in the middle, and possibly a hook ladder attachment meant to make it easier to climb up and down from the surface of the trampoline. There will also be assorted screws and bolts for putting it all together, and possibly some trampoline accessories.
Once you've assembled the frame into its proper shape, it will be time to attach the trampoline mat, and this is usually the part where most home assemblers get very frustrated. The trick to properly attaching the trampoline mat is to keep the tension balanced all the way around the frame while you're hooking up the mat to the springs, and the springs to the frame. People always want to work in a clockwise fashion, and when they get to the last hook, it's far too hard to attach it. Instead, always work across the structure, attaching one hook, and then the hook directly across from it. This way it will be easy to attach the last part of the trampoline mat.
 RSS Feed
